Kamis, 12 Mei 2016
Gimana sih cara bikin pesawat remot mini dari gabus ?
Tutorial singkat berikut foto pembuatan pesawat rc mini ini bersumber
dari thread di grup Facebook Penggemar R/C plane Imut2 dan postingan
dari beberapa anggota membernya .
Terima kasih buat Mas Defy Wingzero , Pak Roji W dan rekan lainnya yang
telah berbagi ilmu pembuatan pesawat RC ini.
Pesawat yang dibuat disini termasuk kelas mini.
Komponen utamanya motor DC coreless , gearbox , propeller , baterai
lipo 1s 3.7v/200mah , Receiver (Rx) boards/PCB bekas WLToys F939
Heli V911 atau heli infrared 2.5 sd 3 Ch yang rusak namun dgn kondisi Rx
yang masih normal tentunya , berikut pasangan Transmitter (Tx) nya.
Pesawat RC ini jauh lebih murah dari pesawat mikro maupun pesawat RC
ukuran sedang /besar.
Kategori mini kisaran wingspan dari 38 cm sampai 50 cm .
Ngapain bikin sendiri sih, beli jadi aja kan praktis ?
Ya , pesawat RTF ( Ready To Fly ) seperti Pole Cat , Heli V911 , Syma dsb
memang layak untuk dicoba sebagai langkah awal di dunia aeromodeling.
Beda biaya antara beli jadi atau bikin sendiri tidaklah terpaut jauh.
Itu tergantung dimana kita membeli parts ( komponen ) RC nya.
Bikin sendiri itu ada kepuasan tersendiri , disamping kita bisa memahami
kinerja avionik sebuah model pesawat.
kadang membuatnya lebih asyik ketimbang menerbangkannya , hehe
ya mungkin karena saya keseringan crash …
Ayo kita siapkan saja alat dan bahannya :
Alat :
Pisau cutter /gantilah jika dirasa sudah tidak rapi hasil potongannya.
Penggaris besi
Alas vinyl / cutting mat / biar pisau tdk cepat tumpul , meja tak tergores
Gunting
Ampelas halus
Korek api
Glue gun / lem tembak
Alat hair bonding / buat bikin bidang lengkung dgn cepat
Pipa pralon atau benda silinder apa saja.
Obeng plus yg kecil dan pensil
Bahan :
Receiver (Rx) atau PCB dari WLToys F939 , WLToys V911
Transceiver (Tx) V911 atau remot Flysky , Turnigy 9x
Propeller ( baling2) dan gearbox F939
Motor DC Coreless dari WLToys F939 berikut pinionnya
Foam bekas kotak nasi atau piringan foam.
Lem CA ( Cyano Acrylate )
Lem Herbond ( Lem Styrofoam )
Lem putih /Lem kayu Fox
Double tape
Selotip
Kawat baja 0.5 - 1 mm ( kawat yg kaku )
Lidi bambu / sisakan kulit bambunya agar kuat
Cat semprot /Pylox
Kertas / buat ngeprint plan dari komputer
Bekas kartu perdana
Korek kuping bayi ( ada ukuran kecil dan agak besar )
Kabel kecil warna merah dan hitam.
Solder dan timahnya
Timbangan digital dan multitester kalo ada
Segelas kopi , lampu terang dan ventilasi yg cukup
juga siapkan P3K , hati-hati dalam memotong..
Tips : Produk terbaik biasanya berbanding lurus
dengan harga. Artinya , ada harga ada kualitas.
Misal jika hanya bikin satu pesawat , gada salahnya
beli selotip yang agak mahalan , krn daya rekatnya
beda dengan yang murah , meski beli yang kemasan
kecil.
Cara membuat :
Potong pola/plans dari internet , tempel pada foam
lalu potong foam sesuai pola.
Gilas potongan foam tadi dengan pipa pralon atau gelas
sampai tipis.
membuat lengkungan body/fuselage bisa degan cara
menggilasnya dengan benda silinder sambil dibuat
lengkungan.
Atau gunakan alat pemanas hair bonding , jepit foam
lalu lengkungkan foamnya. Gunakan suhu hangat , jika
terlalu panas akan meleleh atau getas seperti kerupuk.
Rangkai sayap , rudder dan stabilizer.
Rangkai body / fuselage
Gunakan lem CA yang agak kental ( ditaruh di kulkas dulu )
untuk menyambungkan potongan foamnya
Bisa juga hanya menggunakan double tape.
Lem tembak juga bisa , tapi terlalu berat nanti jadinya
Lem tembak / hot glue hanya untuk pasang motor gearbox
di moncong pesawatnya saja.
Lem styrofoam juga mudah dioleskan , biasanya di Toko
Buku Kharisma ada dijual merknya Herbond.
Lem lain yg bisa dipakai UHU Por biasa ada di Gramedia.
Bisa juga hanya disambung pakai double tape , tapi pilih
yang kualitasnya baik , dan diamplas dulu permukaan foam
yg hendak disambungkan , supaya bisa menempel kuat.
Pemasangan Propeller tidak lurus tetapi miring kanan 2°
( disebut right thrust ). Dan agak nunduk kebawah antara
5° sampai dengan 15° tergantung jenis desain sayapnya.
( disebut down thrust ).
Pemasangan sayap :
Dilihat dari sisi pesawat , irisan sayap agak miring 3°
( disebut Angle of Incident )
Tanpa sudut tersebut pesawat akan meluncur lebih cepat .
Sudut insiden akan menambah daya angkat dan terbang pelan.
Dilihat dari depan pesawat , sayap kiri dan kanan membentuk
huruf V atau dihedral , fungsinya agar pesawat bisa kembali
ke posisi normal secara otomatis jika berbelok di udara.
Pemasangan stab/stabilo ( stabilizer ) :
Pastikan stabilizer atau horizontal control surface sejajar
dengan fuselage line / garis tengah body.
Jika miring , maka akan menyerupai kinerja elevator.
digas sedikit langsung naik atau jadi sebaliknya ga mau terbang.
Pemasangan rudder :
Pastikan tegak lurus dan diberi penguat jika terasa lemah.
Pemasangan roda :
Biasanya ini yg terakhir , karena buat pemula , tidak baik jika
menggunakan aksesoris spt roda di awal pembuatan.
takutnya overweight alias keberatan.
Pasang saja setelah terbukti bisa terbang dengan baik.
Bahan dari kawat kecil yang ulet misal bekas per pulpen
roda dari gabus , spons
atau roda bekas mainan plastik yg tipis/ringan.
Gunakan lem CA untuk menempelkan parts plastik & logam.
Pemasangan linkage / pushrod :
Ini yg paling ribet , kawat dibentuk dan diukur panjangnya , agar
dapat menyalurkan daya dorong & tarik pada lengan servo
untuk menggerakkan aileron. Jika tidak pas maka gerakan servo
tidak cukup untuk membelokkan aileron / rudder.
ada 3 buah pushrod jika menggunakan sistem aileron-stabilizer.
Atau bisa hanya 2 pushrod jika cuma rudder-stabilizer sistemnya.
Lengan servo digunakan agar ketika bergerak , kedua aileron
di sayap bergerak berlawanan sesuai arah belok pesawatnya.
Pemasangan Receiver boards (Rx) :
Untuk boards/PCB WLToys V911 dan sejenisnya yang memiliki
servo terintegrasi didalamnya , idealnya ditempatkan di bawah
sayap , dekat posisi CG ( Center of Gravity ).
Selain membantu keseimbangan , juga agar pushrod tidak
terlalu jauh menjangkau aileron/ruddernya.
Binding atau memadukan antara Rx boards dan Transmitternya
akan terjadi otomatis jika menggunakan remot bawaan aslinya.
Cara Bind Rx V911 dengan remot bawaan V911 :
Hubungkan baterai pada Rx V911 , nyalakan remot V911 dalam
kondisi throttle 0 ( stik throttle mentok ke bawah )
dan aileron 50% ( stik aileron di tengah ).
Ulangi proses diatas jika belum berhasil.
Namun jika menggunakan remot lain , perlu trik dan diulang
setiap kali mematikan / cabut batre pesawatnya.
Contoh binding menggunakan remot Flysky FS-T6 :
Binding dengan Rx board WLToys F939 :
Hubungkan baterai dengan board Rx F939.
Nyalakan remot Flysky FS-T6 sambil menekan tombol bind
dibelakang remotnya , kemudian masih dalam posisi menekan
tombol bind , matikan remot dan lepaskan tombol bind nya.
Nyalakan ulang remot Flysky FS-T6 nya , maka akan langsung
terhubung. Tapi jika baterai Rx dicopot , misal buat dicas , maka
proses tsb harus diulang kembali.
Senin, 18 April 2016
DIY RC MICRO INDOOR PLANE MADE OUT OF FOAM PLATES
|
||||||||||||||||||||||||||||||||||||||||||||||||||||||||||||||||||||||||||||||||||||||||||||||||||||||||||||||||||||||||||||||||||||||||||||||||||||||||||||||||||||||||||||||||||||||||||||||||||||||||||||||||||||||||||||||||||||||||||||||||||||||||||||||||||||||||||||||||||||||||||||||||||||||||||||||||||||||||
| Many remote controlled planes that ready to fly sold by toys industries. | ||||||||||||||||||||||||||||||||||||||||||||||||||||||||||||||||||||||||||||||||||||||||||||||||||||||||||||||||||||||||||||||||||||||||||||||||||||||||||||||||||||||||||||||||||||||||||||||||||||||||||||||||||||||||||||||||||||||||||||||||||||||||||||||||||||||||||||||||||||||||||||||||||||||||||||||||||||||||
| Although there's limited model or the price is too expensive . | ||||||||||||||||||||||||||||||||||||||||||||||||||||||||||||||||||||||||||||||||||||||||||||||||||||||||||||||||||||||||||||||||||||||||||||||||||||||||||||||||||||||||||||||||||||||||||||||||||||||||||||||||||||||||||||||||||||||||||||||||||||||||||||||||||||||||||||||||||||||||||||||||||||||||||||||||||||||||
| Here , we try to recreate , by using their parts into any model planes you like. | ||||||||||||||||||||||||||||||||||||||||||||||||||||||||||||||||||||||||||||||||||||||||||||||||||||||||||||||||||||||||||||||||||||||||||||||||||||||||||||||||||||||||||||||||||||||||||||||||||||||||||||||||||||||||||||||||||||||||||||||||||||||||||||||||||||||||||||||||||||||||||||||||||||||||||||||||||||||||
| We're using parts from micro heli's or planes such as WLToys V911 parts | ||||||||||||||||||||||||||||||||||||||||||||||||||||||||||||||||||||||||||||||||||||||||||||||||||||||||||||||||||||||||||||||||||||||||||||||||||||||||||||||||||||||||||||||||||||||||||||||||||||||||||||||||||||||||||||||||||||||||||||||||||||||||||||||||||||||||||||||||||||||||||||||||||||||||||||||||||||||||
| or
WLToys F929 / F939 parts for the engine ( motor, lipo battery and Tx/Rx ) The main idea is , we could revive the broken heli or planes by harvesting its electrical parts or we can make any model , customize as we like ..and that's just a bit cheaper than buying RTF model plane such as Pole cat or V911 heli . For DIYers , I think it's just more fun...
|
||||||||||||||||||||||||||||||||||||||||||||||||||||||||||||||||||||||||||||||||||||||||||||||||||||||||||||||||||||||||||||||||||||||||||||||||||||||||||||||||||||||||||||||||||||||||||||||||||||||||||||||||||||||||||||||||||||||||||||||||||||||||||||||||||||||||||||||||||||||||||||||||||||||||||||||||||||||||
| The new fuselage or body , wings , rudder and stabilizer are made out of foam plates. | ||||||||||||||||||||||||||||||||||||||||||||||||||||||||||||||||||||||||||||||||||||||||||||||||||||||||||||||||||||||||||||||||||||||||||||||||||||||||||||||||||||||||||||||||||||||||||||||||||||||||||||||||||||||||||||||||||||||||||||||||||||||||||||||||||||||||||||||||||||||||||||||||||||||||||||||||||||||||
| Linkages such as pushrods , clevis , hinges etc are made from bamboo skewer | ||||||||||||||||||||||||||||||||||||||||||||||||||||||||||||||||||||||||||||||||||||||||||||||||||||||||||||||||||||||||||||||||||||||||||||||||||||||||||||||||||||||||||||||||||||||||||||||||||||||||||||||||||||||||||||||||||||||||||||||||||||||||||||||||||||||||||||||||||||||||||||||||||||||||||||||||||||||||
| with skin of bamboo still on it for strenght , thin wire , earbuds sticks and plastic cards. | ||||||||||||||||||||||||||||||||||||||||||||||||||||||||||||||||||||||||||||||||||||||||||||||||||||||||||||||||||||||||||||||||||||||||||||||||||||||||||||||||||||||||||||||||||||||||||||||||||||||||||||||||||||||||||||||||||||||||||||||||||||||||||||||||||||||||||||||||||||||||||||||||||||||||||||||||||||||||
| All foam parts are joined by double tapes or styrofoam glue. | ||||||||||||||||||||||||||||||||||||||||||||||||||||||||||||||||||||||||||||||||||||||||||||||||||||||||||||||||||||||||||||||||||||||||||||||||||||||||||||||||||||||||||||||||||||||||||||||||||||||||||||||||||||||||||||||||||||||||||||||||||||||||||||||||||||||||||||||||||||||||||||||||||||||||||||||||||||||||
| Cyanoacrylate ( CA ) glue applied for plastic and wooden parts. | ||||||||||||||||||||||||||||||||||||||||||||||||||||||||||||||||||||||||||||||||||||||||||||||||||||||||||||||||||||||||||||||||||||||||||||||||||||||||||||||||||||||||||||||||||||||||||||||||||||||||||||||||||||||||||||||||||||||||||||||||||||||||||||||||||||||||||||||||||||||||||||||||||||||||||||||||||||||||
| We can search on internet for the plans . any plans with 38 - 40 cm wingspan is good. | ||||||||||||||||||||||||||||||||||||||||||||||||||||||||||||||||||||||||||||||||||||||||||||||||||||||||||||||||||||||||||||||||||||||||||||||||||||||||||||||||||||||||||||||||||||||||||||||||||||||||||||||||||||||||||||||||||||||||||||||||||||||||||||||||||||||||||||||||||||||||||||||||||||||||||||||||||||||||
| Except for the electronics , almost those parts are around us for free. | ||||||||||||||||||||||||||||||||||||||||||||||||||||||||||||||||||||||||||||||||||||||||||||||||||||||||||||||||||||||||||||||||||||||||||||||||||||||||||||||||||||||||||||||||||||||||||||||||||||||||||||||||||||||||||||||||||||||||||||||||||||||||||||||||||||||||||||||||||||||||||||||||||||||||||||||||||||||||
| List of Parts : | ||||||||||||||||||||||||||||||||||||||||||||||||||||||||||||||||||||||||||||||||||||||||||||||||||||||||||||||||||||||||||||||||||||||||||||||||||||||||||||||||||||||||||||||||||||||||||||||||||||||||||||||||||||||||||||||||||||||||||||||||||||||||||||||||||||||||||||||||||||||||||||||||||||||||||||||||||||||||
| 1 | WLToys V911 or WLToys F939 bricks | |||||||||||||||||||||||||||||||||||||||||||||||||||||||||||||||||||||||||||||||||||||||||||||||||||||||||||||||||||||||||||||||||||||||||||||||||||||||||||||||||||||||||||||||||||||||||||||||||||||||||||||||||||||||||||||||||||||||||||||||||||||||||||||||||||||||||||||||||||||||||||||||||||||||||||||||||||||||
It's Receiver (Rx) unit
for the planes
|
||||||||||||||||||||||||||||||||||||||||||||||||||||||||||||||||||||||||||||||||||||||||||||||||||||||||||||||||||||||||||||||||||||||||||||||||||||||||||||||||||||||||||||||||||||||||||||||||||||||||||||||||||||||||||||||||||||||||||||||||||||||||||||||||||||||||||||||||||||||||||||||||||||||||||||||||||||||||
| 2 | WLToys V911 or WLToys F939 transmitter | |||||||||||||||||||||||||||||||||||||||||||||||||||||||||||||||||||||||||||||||||||||||||||||||||||||||||||||||||||||||||||||||||||||||||||||||||||||||||||||||||||||||||||||||||||||||||||||||||||||||||||||||||||||||||||||||||||||||||||||||||||||||||||||||||||||||||||||||||||||||||||||||||||||||||||||||||||||||
| It's Transceiver (Tx) unit for the planes. | ||||||||||||||||||||||||||||||||||||||||||||||||||||||||||||||||||||||||||||||||||||||||||||||||||||||||||||||||||||||||||||||||||||||||||||||||||||||||||||||||||||||||||||||||||||||||||||||||||||||||||||||||||||||||||||||||||||||||||||||||||||||||||||||||||||||||||||||||||||||||||||||||||||||||||||||||||||||||
| Any Transmitter that using Flysky protocols can be used | ||||||||||||||||||||||||||||||||||||||||||||||||||||||||||||||||||||||||||||||||||||||||||||||||||||||||||||||||||||||||||||||||||||||||||||||||||||||||||||||||||||||||||||||||||||||||||||||||||||||||||||||||||||||||||||||||||||||||||||||||||||||||||||||||||||||||||||||||||||||||||||||||||||||||||||||||||||||||
| ( ie. Flysky FS-T6 , Turnigy 9x etc ) | ||||||||||||||||||||||||||||||||||||||||||||||||||||||||||||||||||||||||||||||||||||||||||||||||||||||||||||||||||||||||||||||||||||||||||||||||||||||||||||||||||||||||||||||||||||||||||||||||||||||||||||||||||||||||||||||||||||||||||||||||||||||||||||||||||||||||||||||||||||||||||||||||||||||||||||||||||||||||
but you must re binding
Tx and Rx after changing battery.
| ||||||||||||||||||||||||||||||||||||||||||||||||||||||||||||||||||||||||||||||||||||||||||||||||||||||||||||||||||||||||||||||||||||||||||||||||||||||||||||||||||||||||||||||||||||||||||||||||||||||||||||||||||||||||||||||||||||||||||||||||||||||||||||||||||||||||||||||||||||||||||||||||||||||||||||||||||||||||
| 3 | WLToys F939 brushed motor ( 8.5 mm ) and pinion ( 9 teeth ). | |||||||||||||||||||||||||||||||||||||||||||||||||||||||||||||||||||||||||||||||||||||||||||||||||||||||||||||||||||||||||||||||||||||||||||||||||||||||||||||||||||||||||||||||||||||||||||||||||||||||||||||||||||||||||||||||||||||||||||||||||||||||||||||||||||||||||||||||||||||||||||||||||||||||||||||||||||||||
| 4 | WLToys F939 propeller ( 5 inch ) and gearbox units. | |||||||||||||||||||||||||||||||||||||||||||||||||||||||||||||||||||||||||||||||||||||||||||||||||||||||||||||||||||||||||||||||||||||||||||||||||||||||||||||||||||||||||||||||||||||||||||||||||||||||||||||||||||||||||||||||||||||||||||||||||||||||||||||||||||||||||||||||||||||||||||||||||||||||||||||||||||||||
| 5 | Lithium polymer battery 1s/3.7v , 160 - 240 maH. | |||||||||||||||||||||||||||||||||||||||||||||||||||||||||||||||||||||||||||||||||||||||||||||||||||||||||||||||||||||||||||||||||||||||||||||||||||||||||||||||||||||||||||||||||||||||||||||||||||||||||||||||||||||||||||||||||||||||||||||||||||||||||||||||||||||||||||||||||||||||||||||||||||||||||||||||||||||||
| 1s battery cable and plug extension. | ||||||||||||||||||||||||||||||||||||||||||||||||||||||||||||||||||||||||||||||||||||||||||||||||||||||||||||||||||||||||||||||||||||||||||||||||||||||||||||||||||||||||||||||||||||||||||||||||||||||||||||||||||||||||||||||||||||||||||||||||||||||||||||||||||||||||||||||||||||||||||||||||||||||||||||||||||||||||
1s Lipo battery charger
|
||||||||||||||||||||||||||||||||||||||||||||||||||||||||||||||||||||||||||||||||||||||||||||||||||||||||||||||||||||||||||||||||||||||||||||||||||||||||||||||||||||||||||||||||||||||||||||||||||||||||||||||||||||||||||||||||||||||||||||||||||||||||||||||||||||||||||||||||||||||||||||||||||||||||||||||||||||||||
| 6 |
Foam plates ( 2mm - 3mm thin
polyfoam )
|
|||||||||||||||||||||||||||||||||||||||||||||||||||||||||||||||||||||||||||||||||||||||||||||||||||||||||||||||||||||||||||||||||||||||||||||||||||||||||||||||||||||||||||||||||||||||||||||||||||||||||||||||||||||||||||||||||||||||||||||||||||||||||||||||||||||||||||||||||||||||||||||||||||||||||||||||||||||||
| 7 | Double tapes | |||||||||||||||||||||||||||||||||||||||||||||||||||||||||||||||||||||||||||||||||||||||||||||||||||||||||||||||||||||||||||||||||||||||||||||||||||||||||||||||||||||||||||||||||||||||||||||||||||||||||||||||||||||||||||||||||||||||||||||||||||||||||||||||||||||||||||||||||||||||||||||||||||||||||||||||||||||||
| clear Cellotapes | ||||||||||||||||||||||||||||||||||||||||||||||||||||||||||||||||||||||||||||||||||||||||||||||||||||||||||||||||||||||||||||||||||||||||||||||||||||||||||||||||||||||||||||||||||||||||||||||||||||||||||||||||||||||||||||||||||||||||||||||||||||||||||||||||||||||||||||||||||||||||||||||||||||||||||||||||||||||||
| 8 | Styrofoam glue ( ie. UHU Por , Herbond ) | |||||||||||||||||||||||||||||||||||||||||||||||||||||||||||||||||||||||||||||||||||||||||||||||||||||||||||||||||||||||||||||||||||||||||||||||||||||||||||||||||||||||||||||||||||||||||||||||||||||||||||||||||||||||||||||||||||||||||||||||||||||||||||||||||||||||||||||||||||||||||||||||||||||||||||||||||||||||
| 9 | CA glue ( Cyanoacrylate ) | |||||||||||||||||||||||||||||||||||||||||||||||||||||||||||||||||||||||||||||||||||||||||||||||||||||||||||||||||||||||||||||||||||||||||||||||||||||||||||||||||||||||||||||||||||||||||||||||||||||||||||||||||||||||||||||||||||||||||||||||||||||||||||||||||||||||||||||||||||||||||||||||||||||||||||||||||||||||
| Hot glue | ||||||||||||||||||||||||||||||||||||||||||||||||||||||||||||||||||||||||||||||||||||||||||||||||||||||||||||||||||||||||||||||||||||||||||||||||||||||||||||||||||||||||||||||||||||||||||||||||||||||||||||||||||||||||||||||||||||||||||||||||||||||||||||||||||||||||||||||||||||||||||||||||||||||||||||||||||||||||
| 10 | Thin Bamboo skewer or 1mm carbon rods. | |||||||||||||||||||||||||||||||||||||||||||||||||||||||||||||||||||||||||||||||||||||||||||||||||||||||||||||||||||||||||||||||||||||||||||||||||||||||||||||||||||||||||||||||||||||||||||||||||||||||||||||||||||||||||||||||||||||||||||||||||||||||||||||||||||||||||||||||||||||||||||||||||||||||||||||||||||||||
| 11 | Plastic cards or any thin plastic sheets . | |||||||||||||||||||||||||||||||||||||||||||||||||||||||||||||||||||||||||||||||||||||||||||||||||||||||||||||||||||||||||||||||||||||||||||||||||||||||||||||||||||||||||||||||||||||||||||||||||||||||||||||||||||||||||||||||||||||||||||||||||||||||||||||||||||||||||||||||||||||||||||||||||||||||||||||||||||||||
| 12 | Cotton threads | |||||||||||||||||||||||||||||||||||||||||||||||||||||||||||||||||||||||||||||||||||||||||||||||||||||||||||||||||||||||||||||||||||||||||||||||||||||||||||||||||||||||||||||||||||||||||||||||||||||||||||||||||||||||||||||||||||||||||||||||||||||||||||||||||||||||||||||||||||||||||||||||||||||||||||||||||||||||
| 13 | Cotton buds sticks or small heat shrink | |||||||||||||||||||||||||||||||||||||||||||||||||||||||||||||||||||||||||||||||||||||||||||||||||||||||||||||||||||||||||||||||||||||||||||||||||||||||||||||||||||||||||||||||||||||||||||||||||||||||||||||||||||||||||||||||||||||||||||||||||||||||||||||||||||||||||||||||||||||||||||||||||||||||||||||||||||||||
| 14 | small wire ( ie. piano wire or small pin wire ) | |||||||||||||||||||||||||||||||||||||||||||||||||||||||||||||||||||||||||||||||||||||||||||||||||||||||||||||||||||||||||||||||||||||||||||||||||||||||||||||||||||||||||||||||||||||||||||||||||||||||||||||||||||||||||||||||||||||||||||||||||||||||||||||||||||||||||||||||||||||||||||||||||||||||||||||||||||||||
| 15 | Paint ( polyfoam has thin plastic cover so we can use | |||||||||||||||||||||||||||||||||||||||||||||||||||||||||||||||||||||||||||||||||||||||||||||||||||||||||||||||||||||||||||||||||||||||||||||||||||||||||||||||||||||||||||||||||||||||||||||||||||||||||||||||||||||||||||||||||||||||||||||||||||||||||||||||||||||||||||||||||||||||||||||||||||||||||||||||||||||||
| spray paint but take about 40 cm far or more from it. ) | ||||||||||||||||||||||||||||||||||||||||||||||||||||||||||||||||||||||||||||||||||||||||||||||||||||||||||||||||||||||||||||||||||||||||||||||||||||||||||||||||||||||||||||||||||||||||||||||||||||||||||||||||||||||||||||||||||||||||||||||||||||||||||||||||||||||||||||||||||||||||||||||||||||||||||||||||||||||||
| List of tools | ||||||||||||||||||||||||||||||||||||||||||||||||||||||||||||||||||||||||||||||||||||||||||||||||||||||||||||||||||||||||||||||||||||||||||||||||||||||||||||||||||||||||||||||||||||||||||||||||||||||||||||||||||||||||||||||||||||||||||||||||||||||||||||||||||||||||||||||||||||||||||||||||||||||||||||||||||||||||
| 1 | Sharp Cutter , hobby knife or surgery knife | |||||||||||||||||||||||||||||||||||||||||||||||||||||||||||||||||||||||||||||||||||||||||||||||||||||||||||||||||||||||||||||||||||||||||||||||||||||||||||||||||||||||||||||||||||||||||||||||||||||||||||||||||||||||||||||||||||||||||||||||||||||||||||||||||||||||||||||||||||||||||||||||||||||||||||||||||||||||
| 2 | Scissor | |||||||||||||||||||||||||||||||||||||||||||||||||||||||||||||||||||||||||||||||||||||||||||||||||||||||||||||||||||||||||||||||||||||||||||||||||||||||||||||||||||||||||||||||||||||||||||||||||||||||||||||||||||||||||||||||||||||||||||||||||||||||||||||||||||||||||||||||||||||||||||||||||||||||||||||||||||||||
| 3 | Glue applicator ( DIY using tooth picks ) | |||||||||||||||||||||||||||||||||||||||||||||||||||||||||||||||||||||||||||||||||||||||||||||||||||||||||||||||||||||||||||||||||||||||||||||||||||||||||||||||||||||||||||||||||||||||||||||||||||||||||||||||||||||||||||||||||||||||||||||||||||||||||||||||||||||||||||||||||||||||||||||||||||||||||||||||||||||||
| 4 | Marker pen | |||||||||||||||||||||||||||||||||||||||||||||||||||||||||||||||||||||||||||||||||||||||||||||||||||||||||||||||||||||||||||||||||||||||||||||||||||||||||||||||||||||||||||||||||||||||||||||||||||||||||||||||||||||||||||||||||||||||||||||||||||||||||||||||||||||||||||||||||||||||||||||||||||||||||||||||||||||||
| 5 | Ruler | |||||||||||||||||||||||||||||||||||||||||||||||||||||||||||||||||||||||||||||||||||||||||||||||||||||||||||||||||||||||||||||||||||||||||||||||||||||||||||||||||||||||||||||||||||||||||||||||||||||||||||||||||||||||||||||||||||||||||||||||||||||||||||||||||||||||||||||||||||||||||||||||||||||||||||||||||||||||
| 6 | Small Philip Screwdriver | |||||||||||||||||||||||||||||||||||||||||||||||||||||||||||||||||||||||||||||||||||||||||||||||||||||||||||||||||||||||||||||||||||||||||||||||||||||||||||||||||||||||||||||||||||||||||||||||||||||||||||||||||||||||||||||||||||||||||||||||||||||||||||||||||||||||||||||||||||||||||||||||||||||||||||||||||||||||
| 7 | Matches | |||||||||||||||||||||||||||||||||||||||||||||||||||||||||||||||||||||||||||||||||||||||||||||||||||||||||||||||||||||||||||||||||||||||||||||||||||||||||||||||||||||||||||||||||||||||||||||||||||||||||||||||||||||||||||||||||||||||||||||||||||||||||||||||||||||||||||||||||||||||||||||||||||||||||||||||||||||||
| 8 | Rubber mat | |||||||||||||||||||||||||||||||||||||||||||||||||||||||||||||||||||||||||||||||||||||||||||||||||||||||||||||||||||||||||||||||||||||||||||||||||||||||||||||||||||||||||||||||||||||||||||||||||||||||||||||||||||||||||||||||||||||||||||||||||||||||||||||||||||||||||||||||||||||||||||||||||||||||||||||||||||||||
| 9 | Mini weight scale | |||||||||||||||||||||||||||||||||||||||||||||||||||||||||||||||||||||||||||||||||||||||||||||||||||||||||||||||||||||||||||||||||||||||||||||||||||||||||||||||||||||||||||||||||||||||||||||||||||||||||||||||||||||||||||||||||||||||||||||||||||||||||||||||||||||||||||||||||||||||||||||||||||||||||||||||||||||||
Battery indicator or
multimeter
|
||||||||||||||||||||||||||||||||||||||||||||||||||||||||||||||||||||||||||||||||||||||||||||||||||||||||||||||||||||||||||||||||||||||||||||||||||||||||||||||||||||||||||||||||||||||||||||||||||||||||||||||||||||||||||||||||||||||||||||||||||||||||||||||||||||||||||||||||||||||||||||||||||||||||||||||||||||||||
| Caution | ||||||||||||||||||||||||||||||||||||||||||||||||||||||||||||||||||||||||||||||||||||||||||||||||||||||||||||||||||||||||||||||||||||||||||||||||||||||||||||||||||||||||||||||||||||||||||||||||||||||||||||||||||||||||||||||||||||||||||||||||||||||||||||||||||||||||||||||||||||||||||||||||||||||||||||||||||||||||
| Be careful when using sharp object such as surgery knife . | ||||||||||||||||||||||||||||||||||||||||||||||||||||||||||||||||||||||||||||||||||||||||||||||||||||||||||||||||||||||||||||||||||||||||||||||||||||||||||||||||||||||||||||||||||||||||||||||||||||||||||||||||||||||||||||||||||||||||||||||||||||||||||||||||||||||||||||||||||||||||||||||||||||||||||||||||||||||||
| Charging Lipo batteries on proper charger for safety. | ||||||||||||||||||||||||||||||||||||||||||||||||||||||||||||||||||||||||||||||||||||||||||||||||||||||||||||||||||||||||||||||||||||||||||||||||||||||||||||||||||||||||||||||||||||||||||||||||||||||||||||||||||||||||||||||||||||||||||||||||||||||||||||||||||||||||||||||||||||||||||||||||||||||||||||||||||||||||
| Use enough ventilation and light for work. | ||||||||||||||||||||||||||||||||||||||||||||||||||||||||||||||||||||||||||||||||||||||||||||||||||||||||||||||||||||||||||||||||||||||||||||||||||||||||||||||||||||||||||||||||||||||||||||||||||||||||||||||||||||||||||||||||||||||||||||||||||||||||||||||||||||||||||||||||||||||||||||||||||||||||||||||||||||||||
| Step to Do First I want to say thank you for Defy Wingzero who willing share photo |
||||||||||||||||||||||||||||||||||||||||||||||||||||||||||||||||||||||||||||||||||||||||||||||||||||||||||||||||||||||||||||||||||||||||||||||||||||||||||||||||||||||||||||||||||||||||||||||||||||||||||||||||||||||||||||||||||||||||||||||||||||||||||||||||||||||||||||||||||||||||||||||||||||||||||||||||||||||||
| on Facebook Group Pesawat imut2 including step by step how to do it. | ||||||||||||||||||||||||||||||||||||||||||||||||||||||||||||||||||||||||||||||||||||||||||||||||||||||||||||||||||||||||||||||||||||||||||||||||||||||||||||||||||||||||||||||||||||||||||||||||||||||||||||||||||||||||||||||||||||||||||||||||||||||||||||||||||||||||||||||||||||||||||||||||||||||||||||||||||||||||
| Let's get your foam plates and cut its edges , leaving a flat sheets. | ||||||||||||||||||||||||||||||||||||||||||||||||||||||||||||||||||||||||||||||||||||||||||||||||||||||||||||||||||||||||||||||||||||||||||||||||||||||||||||||||||||||||||||||||||||||||||||||||||||||||||||||||||||||||||||||||||||||||||||||||||||||||||||||||||||||||||||||||||||||||||||||||||||||||||||||||||||||||
| Print your plan on paper , cut it then fit to the foam sheet. | ||||||||||||||||||||||||||||||||||||||||||||||||||||||||||||||||||||||||||||||||||||||||||||||||||||||||||||||||||||||||||||||||||||||||||||||||||||||||||||||||||||||||||||||||||||||||||||||||||||||||||||||||||||||||||||||||||||||||||||||||||||||||||||||||||||||||||||||||||||||||||||||||||||||||||||||||||||||||
Cut the foam according
the plan then press all foam parts for more flat..
|
||||||||||||||||||||||||||||||||||||||||||||||||||||||||||||||||||||||||||||||||||||||||||||||||||||||||||||||||||||||||||||||||||||||||||||||||||||||||||||||||||||||||||||||||||||||||||||||||||||||||||||||||||||||||||||||||||||||||||||||||||||||||||||||||||||||||||||||||||||||||||||||||||||||||||||||||||||||||
| Gather all foam parts into complete plane by double tape or | ||||||||||||||||||||||||||||||||||||||||||||||||||||||||||||||||||||||||||||||||||||||||||||||||||||||||||||||||||||||||||||||||||||||||||||||||||||||||||||||||||||||||||||||||||||||||||||||||||||||||||||||||||||||||||||||||||||||||||||||||||||||||||||||||||||||||||||||||||||||||||||||||||||||||||||||||||||||||
| styrofoam glue.Bent the foam gently and
use cylindrical object like blunt table edges , glass or pipe for curved shape.Just don't push too hard , the thin layer of plastic on the foam will keep them from breaking apart. | ||||||||||||||||||||||||||||||||||||||||||||||||||||||||||||||||||||||||||||||||||||||||||||||||||||||||||||||||||||||||||||||||||||||||||||||||||||||||||||||||||||||||||||||||||||||||||||||||||||||||||||||||||||||||||||||||||||||||||||||||||||||||||||||||||||||||||||||||||||||||||||||||||||||||||||||||||||||||
|
||||||||||||||||||||||||||||||||||||||||||||||||||||||||||||||||||||||||||||||||||||||||||||||||||||||||||||||||||||||||||||||||||||||||||||||||||||||||||||||||||||||||||||||||||||||||||||||||||||||||||||||||||||||||||||||||||||||||||||||||||||||||||||||||||||||||||||||||||||||||||||||||||||||||||||||||||||||||
| using hair straightening in low temperature may help , but it's little tricky because | ||||||||||||||||||||||||||||||||||||||||||||||||||||||||||||||||||||||||||||||||||||||||||||||||||||||||||||||||||||||||||||||||||||||||||||||||||||||||||||||||||||||||||||||||||||||||||||||||||||||||||||||||||||||||||||||||||||||||||||||||||||||||||||||||||||||||||||||||||||||||||||||||||||||||||||||||||||||||
if overheat , this tool will melt the foam or they loosing flexibility and more fragile.
| ||||||||||||||||||||||||||||||||||||||||||||||||||||||||||||||||||||||||||||||||||||||||||||||||||||||||||||||||||||||||||||||||||||||||||||||||||||||||||||||||||||||||||||||||||||||||||||||||||||||||||||||||||||||||||||||||||||||||||||||||||||||||||||||||||||||||||||||||||||||||||||||||||||||||||||||||||||||||
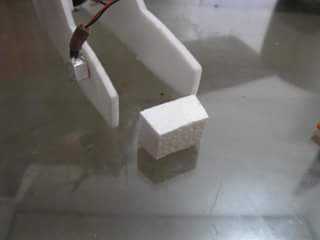
| Install V911/F939 Receiver in the fuselage using little drops | ||||||||||||||||||||||||||||||||||||||||||||||||||||||||||||||||||||||||||||||||||||||||||||||||||||||||||||||||||||||||||||||||||||||||||||||||||||||||||||||||||||||||||||||||||||||||||||||||||||||||||||||||||||||||||||||||||||||||||||||||||||||||||||||||||||||||||||||||||||||||||||||||||||||||||||||||||||||||
| of hot glue. Remove servo
horn temporary and fit to pushrod first then screw on servo. Connect 8.5 mm brushed motor with F939 gear pinion to main motor terminals.
We can also using tail motor and main motor terminals for differential thrust . It means that we 're using 2 motors side by side , turning left or right by controlling speed of each motor. But we must disable the tail gyro first by opening lid of gyro parts and then removing little metal bar inside it , and put the lid back by gluing it.
Another way for disable gyro is easier , by put V911 receiver on vertical.
|
||||||||||||||||||||||||||||||||||||||||||||||||||||||||||||||||||||||||||||||||||||||||||||||||||||||||||||||||||||||||||||||||||||||||||||||||||||||||||||||||||||||||||||||||||||||||||||||||||||||||||||||||||||||||||||||||||||||||||||||||||||||||||||||||||||||||||||||||||||||||||||||||||||||||||||||||||||||||
| Put motors gearbox and propeller , use hot glue. | ||||||||||||||||||||||||||||||||||||||||||||||||||||||||||||||||||||||||||||||||||||||||||||||||||||||||||||||||||||||||||||||||||||||||||||||||||||||||||||||||||||||||||||||||||||||||||||||||||||||||||||||||||||||||||||||||||||||||||||||||||||||||||||||||||||||||||||||||||||||||||||||||||||||||||||||||||||||||
| Give it right thrust about 2 - 3 degrees and down thrust about | ||||||||||||||||||||||||||||||||||||||||||||||||||||||||||||||||||||||||||||||||||||||||||||||||||||||||||||||||||||||||||||||||||||||||||||||||||||||||||||||||||||||||||||||||||||||||||||||||||||||||||||||||||||||||||||||||||||||||||||||||||||||||||||||||||||||||||||||||||||||||||||||||||||||||||||||||||||||||
5 - 15 degrees. Yes it's
needs more down thrust than big planes.
|
||||||||||||||||||||||||||||||||||||||||||||||||||||||||||||||||||||||||||||||||||||||||||||||||||||||||||||||||||||||||||||||||||||||||||||||||||||||||||||||||||||||||||||||||||||||||||||||||||||||||||||||||||||||||||||||||||||||||||||||||||||||||||||||||||||||||||||||||||||||||||||||||||||||||||||||||||||||||
| Give the wings about 3 degrees for
Angle of Incident . Angle of incident is the angle of the wings relative to the main fuselage line. When the planes start on runway , it wings through the wind with angle of attack , and then Newton & Bernoulli law will creating lift that makes the planes flying. Highwing or wing on top like Cessna plane would suit for beginner flyer , slow characters. Low wing or wing under fuselage wings like P-51 Mustang , Pole Cat best for speed and experienced flyer.
|
||||||||||||||||||||||||||||||||||||||||||||||||||||||||||||||||||||||||||||||||||||||||||||||||||||||||||||||||||||||||||||||||||||||||||||||||||||||||||||||||||||||||||||||||||||||||||||||||||||||||||||||||||||||||||||||||||||||||||||||||||||||||||||||||||||||||||||||||||||||||||||||||||||||||||||||||||||||||
Give a little dihedral
angle on the mid of the wings. Make sure horizontal stabilizer fins is straight parallel with plane chord lines. so they won't act as elevators. |
||||||||||||||||||||||||||||||||||||||||||||||||||||||||||||||||||||||||||||||||||||||||||||||||||||||||||||||||||||||||||||||||||||||||||||||||||||||||||||||||||||||||||||||||||||||||||||||||||||||||||||||||||||||||||||||||||||||||||||||||||||||||||||||||||||||||||||||||||||||||||||||||||||||||||||||||||||||||
| Make aileron by scoring
the foam and use cellotapes for hinges. Glue them all to the fuselage after electrical and linkages are ready.
|
||||||||||||||||||||||||||||||||||||||||||||||||||||||||||||||||||||||||||||||||||||||||||||||||||||||||||||||||||||||||||||||||||||||||||||||||||||||||||||||||||||||||||||||||||||||||||||||||||||||||||||||||||||||||||||||||||||||||||||||||||||||||||||||||||||||||||||||||||||||||||||||||||||||||||||||||||||||||
| Put decal or use marker and spray paint for coloring. | ||||||||||||||||||||||||||||||||||||||||||||||||||||||||||||||||||||||||||||||||||||||||||||||||||||||||||||||||||||||||||||||||||||||||||||||||||||||||||||||||||||||||||||||||||||||||||||||||||||||||||||||||||||||||||||||||||||||||||||||||||||||||||||||||||||||||||||||||||||||||||||||||||||||||||||||||||||||||
| Remember spray paint can make foam melt if too close. | ||||||||||||||||||||||||||||||||||||||||||||||||||||||||||||||||||||||||||||||||||||||||||||||||||||||||||||||||||||||||||||||||||||||||||||||||||||||||||||||||||||||||||||||||||||||||||||||||||||||||||||||||||||||||||||||||||||||||||||||||||||||||||||||||||||||||||||||||||||||||||||||||||||||||||||||||||||||||
| Using foam paint is recommended. | ||||||||||||||||||||||||||||||||||||||||||||||||||||||||||||||||||||||||||||||||||||||||||||||||||||||||||||||||||||||||||||||||||||||||||||||||||||||||||||||||||||||||||||||||||||||||||||||||||||||||||||||||||||||||||||||||||||||||||||||||||||||||||||||||||||||||||||||||||||||||||||||||||||||||||||||||||||||||
| Make little wheels made out of
foam or take it from scavenged toys. I use tiny wire from fireworks stick , thin but stiff enough for supports. Put 1 mm heat shrinks or a drop of hot glue on both side of wheels for stability . Heated earbud sticks also can used.
| ||||||||||||||||||||||||||||||||||||||||||||||||||||||||||||||||||||||||||||||||||||||||||||||||||||||||||||||||||||||||||||||||||||||||||||||||||||||||||||||||||||||||||||||||||||||||||||||||||||||||||||||||||||||||||||||||||||||||||||||||||||||||||||||||||||||||||||||||||||||||||||||||||||||||||||||||||||||||


Langganan:
Postingan (Atom)