DIY
RC MICRO INDOOR PLANE MADE OUT OF FOAM PLATES
l |
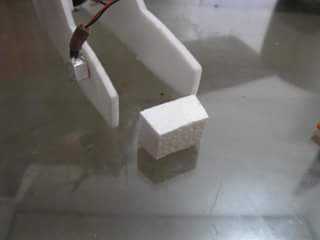
| Mini Scout with F939 brick mounted downward |
 |
| F939 inside taken from RC Groups |
|
|
|
|
|
|
|
|
|
|
|
|
|
|
| Many remote controlled planes that ready
to fly sold by toys industries. | | | | | | | | | | | | | | | | | | | | | | | | | | | | | | | | | | | | | | |
|
| Although
there's limited model or the price is too expensive . | | |
|
|
| Here
, we try to recreate , by using their parts into any model planes you like. |
|
| We're
using parts from micro heli's or planes such as WLToys V911 parts |
|
or
WLToys F929 / F939 parts for the engine ( motor, lipo battery and Tx/Rx )
The main idea is , we could revive the broken heli or planes by harvesting its electrical parts
or we can make any model , customize as we like ..and that's just a bit cheaper than buying
RTF model plane such as Pole cat or V911 heli . For DIYers , I think it's just more fun...
 |
| V911 Heli |
 |
| F929 Plane |
|
|
| The
new fuselage or body , wings , rudder and stabilizer are made out of foam plates. |
|
| Linkages such as pushrods , clevis , hinges etc are made from bamboo skewer |
|
| with skin of bamboo still on it for strenght , thin wire , earbuds sticks and plastic cards. |
|
| All
foam parts are joined by double tapes or styrofoam glue. |
|
|
| Cyanoacrylate
( CA ) glue applied for plastic and wooden parts. |
|
|
| We
can search on internet for the plans . any plans with 38 - 40 cm wingspan is good. |
|
|
|
|
| Except
for the electronics , almost those parts are around us for free. |
|
|
|
|
|
|
|
|
|
|
| List of Parts : |
|
|
|
|
|
|
|
|
|
|
|
| 1 |
WLToys V911 or WLToys
F939 bricks |
|
|
|
|
|
It's Receiver (Rx) unit
for the planes
 |
| F929/F939 Receiver unit |
 |
| V911 Receiver unit |
|
|
|
|
|
| 2 |
WLToys V911 or WLToys
F939 transmitter |
|
|
|
|
|
It's Transceiver (Tx)
unit for the planes. |
|
|
|
|
|
Any Transmitter that
using Flysky protocols can be used |
|
|
|
( ie. Flysky FS-T6 ,
Turnigy 9x etc ) |
|
|
|
|
|
but you must re binding
Tx and Rx after changing battery.
 |
| FlySky FS-T6 transmitter |
 |
| WLToys mini transmitter |
| |
|
|
| 3 |
WLToys F939 brushed motor
( 8.5 mm ) and pinion ( 9 teeth ). |
|
|
| 4 |
WLToys F939 propeller ( 5
inch ) and gearbox units. |
|
|
|
| 5 |
Lithium polymer battery
1s/3.7v , 160 - 240 maH. |
|
|
|
|
1s battery cable and plug
extension. |
|
|
|
|
|
1s Lipo battery charger
 |
| Lipo battery charger |
 |
| Gear & propeller |
|
|
|
|
|
6
|
Foam plates ( 2mm - 3mm thin
polyfoam )
 |
| cut using sharp knife or scissors |
 |
| Put your plan on flat area |
|
|
|
|
|
| 7 |
Double tapes |
|
|
|
|
|
|
|
clear Cellotapes |
|
|
|
|
|
|
| 8 |
Styrofoam glue ( ie. UHU
Por , Herbond ) |
|
|
|
|
| 9 |
CA glue ( Cyanoacrylate ) |
|
|
|
|
|
|
Hot glue |
|
|
|
|
|
|
|
| 10 |
Thin Bamboo skewer or 1mm
carbon rods. |
|
|
|
| 11 |
Plastic cards or any thin
plastic sheets . |
|
|
|
|
| 12 |
Cotton threads |
|
|
|
|
|
|
| 13 |
Cotton buds sticks or
small heat shrink |
|
|
|
|
| 14 |
small wire ( ie. piano
wire or small pin wire ) |
|
|
|
| 15 |
Paint ( polyfoam has thin
plastic cover so we can use |
|
|
|
spray paint but take
about 40 cm far or more from it. ) |
|
|
|
|
|
|
|
|
|
|
|
| List of tools |
|
|
|
|
|
|
|
|
|
|
|
| 1 |
Sharp Cutter , hobby
knife or surgery knife |
|
|
|
| 2 |
Scissor |
|
|
|
|
|
|
|
| 3 |
Glue applicator ( DIY
using tooth picks ) |
|
|
|
|
| 4 |
Marker pen |
|
|
|
|
|
|
| 5 |
Ruler |
|
|
|
|
|
|
|
| 6 |
Small Philip Screwdriver |
|
|
|
|
|
| 7 |
Matches |
|
|
|
|
|
|
|
| 8 |
Rubber mat |
|
|
|
|
|
|
| 9 |
Mini weight scale |
|
|
|
|
|
|
|
Battery indicator or
multimeter
 |
| Double tapes is lighter than hot glue |
|
|
|
|
|
|
|
|
|
|
|
|
|
|
| Caution |
|
|
|
|
|
|
|
|
|
|
|
|
Be careful when using
sharp object such as surgery knife . |
|
|
|
Charging Lipo batteries
on proper charger for safety. |
|
|
|
Use enough ventilation
and light for work. |
|
|
|
|
|
|
|
|
|
|
|
|
Step to Do
First I want to say thank you for Defy Wingzero who willing share photo |
|
|
|
on Facebook Group Pesawat imut2 including step by step how to do it. |
|
|
|
|
|
|
|
|
Let's get your foam plates and
cut its edges , leaving a flat sheets. |
|
|
|
Print your plan on paper
, cut it then fit to the foam sheet. |
|
|
|
Cut the foam according
the plan then press all foam parts for more flat..
 |
| Stabilo and rudder |
 |
| wing pattern |
 |
| wings |
 |
| Ready for glued |
|
|
|
|
|
|
Gather all foam parts
into complete plane by double tape or |
|
|
|
styrofoam glue.Bent the foam gently and
use cylindrical object like blunt table
edges , glass or pipe for curved shape.Just don't push too hard , the thin layer
of plastic on the foam will keep them from breaking apart. | |
|
|
|
 |
| Wings joined |
 |
| Curved wing |
 |
| Bent using curved edges of a table |
|
|
|
|
using hair straightening in low temperature may help , but
it's little tricky because |
|
|
|
if overheat , this tool will melt the foam or they loosing flexibility and more fragile.
 |
| Hair straightener |
| |
|
|
|
|
|
|
|
|
|
|
|
|
|
|
Install V911/F939
Receiver in the fuselage using little drops |
|
|
|
of hot glue. Remove servo
horn temporary and fit to pushrod first then screw on servo.
Connect 8.5 mm brushed motor with F939 gear pinion to main motor terminals.
 |
| Pinout V911boards |
Or we can run it without gearbox using direct drive propeller , 2 - 4 inch prop will suffice.
We can also using tail motor and main motor terminals for differential thrust .
It means that we 're using 2 motors side by side , turning left or right by controlling speed
of each motor. But we must disable the tail gyro first by opening lid of gyro parts and then
removing little metal bar inside it , and put the lid back by gluing it.
 |
| V911 gyro parts |
 |
| Twin motors direct drive props with differential thrust |
Another way for disable gyro is easier , by put V911 receiver on vertical.
 |
| V911 boards vertical placement |
|
|
|
 |
| Receiver on board |
 |
| Synchronizing linkage with radio sticks |
 |
| Spar made of thin bamboo skewer |
 |
| Bamboo skin left on pushrod for strength |
 |
| Left for aileron , right for elevator |
 |
| Linkage made of thin wire and plastic card |
|
|
|
|
|
|
|
|
Put motors gearbox and
propeller , use hot glue. |
|
|
|
|
Give it right thrust
about 2 - 3 degrees and down thrust about |
|
|
|
5 - 15 degrees. Yes it's
needs more down thrust than big planes.
 |
| Top nose block |
 |
| Bottom nose block |
|
|
|
 |
| Join with hot glue |
 |
| 5 - 15 degree downthrust |
 |
| Right thrust 2 -3 degrees |
 |
| Right thrust |
 |
| Almost dig the ground |
|
|
|
|
|
Give the wings about 3 degrees for
Angle of Incident .
Angle of incident is the angle of the wings relative to the main fuselage line.
When the planes start on runway , it wings through the wind with angle of attack , and
then Newton & Bernoulli law will creating lift that makes the planes flying.
Highwing or wing on top like Cessna plane would suit for beginner flyer , slow characters.
Low wing or wing under fuselage wings like P-51 Mustang , Pole Cat best for speed and
experienced flyer.
 |
| wing looks from side |
|
|
|
|
|
Give a little dihedral
angle on the mid of the wings.
Make sure horizontal stabilizer fins is straight parallel with plane chord lines.
so they won't act as elevators. |
|
|
|
|
Make aileron by scoring
the foam and use cellotapes for hinges.
Glue them all to the fuselage after electrical and linkages are ready.
 |
| make a dihedral angle for stable flying |
 |
| Main wings joint |
 |
| Aileron |
 |
| Bamboo skewer as spar |
 |
| Cellotapes for hinges |
 |
| Add foam for strengthen the corner |
 |
| Score at downside and make 45 degree |
 |
| Stabilizer |
|
|
|
|
|
|
|
|
|
|
|
|
Put decal or use marker
and spray paint for coloring. |
|
|
|
Remember spray paint can
make foam melt if too close. |
|
|
|
Using foam paint is
recommended. |
|
|
|
|
|
|
|
|
|
|
|
|
|
|
Make little wheels made out of
foam or take it from scavenged toys.
I use tiny wire from fireworks stick , thin but stiff enough for supports.
Put 1 mm heat shrinks or a drop of hot glue on both side of wheels for
stability . Heated earbud sticks also can used.
 |
| Wheel base |
 |
| Thin wire on plastic sheet ,CA glued |
 |
| Small beads for tail wheel |
 |
| Wheel hub |
 |
| Wheel taken from a toy car |
|
|
|
|
Make pushrods by
attaching small wire on each tip of bamboo |
|
|
skewer and secure it by
inserting cotton buds sticks . |
|
|
|
burn the cotton buds
sticks a little by matches so its act like |
|
|
|
heat shrinks . You can
use small heat shrinks if you have one. |
|
|
|
Put Servo horn into small
wire that's attached on pushrod. |
|
|
|
then install servo horn
on the servo by screwdriver. |
|
|
|
Adjust the length of
pushrod wires until you have proper |
|
|
|
distance. Plastic card is used for making control horns.
|
|
|
|
|
|
|
|
|
|
|
|
|
|
|
It's important to make
servo horns on normal position ( 90 deg ) |
|
|
By binding the Receiver
bricks with Transmitter it will set servos |
|
|
automatically on normal
position , you just put/screw the horn on |
|
|
90 degree position.
|
|
|
|
|
|
|
|
|
|
|
|
|
|
|
|
|
Plug lipo battery , make
sure it's on right polarity. |
|
|
|
|
Balance the plane by
sliding the battery according to its CG. |
|
|
|
( Center of Gravity ). |
|
|
|
|
|
|
Use stopwatch when flying
so you won't make your lipo battery |
|
|
undervoltages. |
|
|
|
|
|
|
|
Check all wire connection
and plugs |
|
|
|
|
|
 |
| Find best battery positions by sliding it , refer to plane CG's |
|
|
|
|
|
|
|
|
|
Make all things as light
as possible for better flying experience. |
|
|
If we make it light then
it will fly like a feather or if it heavy then |
|
|
it will fly like a brick. |
|
|
|
|
|
|
This micro planes needs
downthrust , AoA , dihedral wings rather |
|
|
more than bigger or
normal size RC planes. |
|
|
|
|
 |
Give it colours for better looking
|
| |
|
|
|
|
|
|
|
Find an open field with
high grass for gliding test , |
|
|
|
|
choose time in the
morning for flying when the air still calm . |
|
|
|
Throw your plane gently
against the wind , put the elevator upward a little |
|
If your plane glide well
, you can switch on and start flying.
Point the plane against the wind for landing and take off.
 |
| CoG test Glide |
Center of Gravity is 25% - 35% from leading edge , insert your battery
and put both your fore fingers on left and right wings CoG 's.
 |
| CoG position |
Slides battery forward/backwards until plane nose and tails was balanced.
If your plane is nose heavy it will dive easily to the ground.
If your plane is little nose heavy it will fly but rather hard to control.
If your plane is little tail heavy it will fly just like a Dolphin.
Just slide battery forward a little then your problem is solved.
If your plane is tail heavy it won't fly at all.
 |
| Put fore fingers on CG and slide battery |
 |
| Hanging threads balancing left-right |
|
|
|
|
Always brings tool box
with every little bits that we need inside. |
|
|
|
Keep away from crowded
place , kids , dogs and private property.
 |
| Beware of running propeller , may causing injury |
 |
| High grass will prevent damages on first flying |
| |
|


kopasan milik om tirto wijanarso.....hehehehe om smsin bagusan board v911 apa f929 ....lagi ngebet mau maiden malah kebakar board ane 081289250633 cepet om ya tanya om roji w belum di jawab
BalasHapusHehehe , ya skalian buat catetan pribadi aja , daripada browsing ga dapet2 , klo buat single propeller ya F939 , lbih kuat n itu juga saran Mas Defy , klo V911 buat yang dual propeller kiri kanan bisa tp itu blom kucoba .
BalasHapusIt’s amazing, I’m so admired by bloggers, the internal devices are so complicated, DIY’s RC model is exactly the same as that sold on the market.
BalasHapusThanks Mr Torben , my friend Defy is the person who make those planes. He was even make diy small propeller from bamboo. Now he make foam planes kit at regular size.
HapusFantastic tutorial. I have aproblem after removing the gyro. I am using it in a on motor plane NOT Twin . The motor start with out control from the TX. Is a Heli brick only good for a twon engine or it can only be used with one motor plane. Thanks
BalasHapusHeli brick best for single motor , because output for main blades motor are different rpm from tail blades motor
Hapus